Monday, April 30, 2007

Sharing projects I love

Tonight I wanted to share some cards created by other cool folks. This first project is a baby announcement made by a first-time stamper who literally had only a 10 minute stamping "class" from me before she ordered all the materials she needed to make these birth announcements for her new granddaughter. I wish I could take the credit for the design, but it's a design copied directly out of the Idea Book and Catalog -we just changed the colors from blue to pink! I think the announcements came out great, and her new granddaughter is just adorable. Wouldn't you agree?
This second project was created by my good friend as an invitation to her son's birthday party. This too is a copy of a design featured in last year's summer mini, though Diana did slightly modify the invitation insert and gave the cowboy a cool little striped shirt with her markers. She also used the Cowboy Kid stamp set (not available right now, but could possibly be available again in July -- cross your fingers!) to stamp the favor gift bags for all the kids who attended the party. So cool!

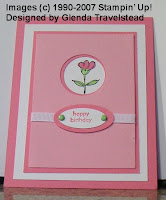
This last card was designed by one of my fellow SISers -- Dawn Mondro. I loved it so much I copied it for my all occasion card club. I didn't have the It's Your Birthday set, so I had to modify the design somewhat, but I kept the layout the same and, most important of all, I kept the glitter. The glitter really just makes this card pop! You can see my version of this design in yesterday's post.

Don't forget, this year's retirement list is coming out tomorrow! I can't wait! And now that April is almost over, it's also almost time to draw the winners of the subscriber and referral drawings. I have a meeting tomorrow night so I won;t be able to draw then, but I will try to do it Wednesday or Thrusday and, as promised, will post the winners here. Stay tuned!

Sunday, April 29, 2007

All Occasion Card Club

Join the Stamp With Diane All Occasion Card Club and never get caught without an appropriate greeting card again! We'll meet once a month for three months (May - July). Each month every member will make 4 copies of 4 of the 12 designs pictured below (every member gets to select the order in which they want to make the cards and may select a different sentiment than the sentiment featured on the sample card). (If you cannot make it to any month's class, you will be able to make the cards at my open stamp night.) The class fee is payable at registration and includes 48 cards (4 each of 12 designs) plus a Forget Me Not Keeper to store the cards. See my website or e-mail me at stampwithdiane@comcast.net for details.


A really cool swap card!

Yesterday I told you all about the fabulous Stampers in Stitches meetings and the awesome swap cards I came home with. I still am not able to show you all the cards, but I really loved this card and wanted to share it with everyone and the designer, Mavis Kim, kindly gave her permission for me to post it here.

There are so many things I love about this card! It appealed to me right away and the longer I looked at it the more cool things I found. First, it uses Not Quite Navy card stock, ink and brads. This is a color I have a particular difficulty working with, and I just love the fact that I now have a super cute card to use it on. Second, I love the double coloring on the elephant -- making his ear darker really adds a great touch. Next is the paper piercing in the corners of the main image and the upper left hand corner above the not quite navy mat (this is a little hard to see in the picture). The paper piercing adds such a nice touch! Next is the very subtle crosshatch background from the Looks Like Spring set on the Ruby Red portion of the card. It's so subtle you can hardly see it int he photo, but it adds such a nice texture to this card IRL. And last, but certainly not least, is the tree-color design on the white strip created by stamping the same pattern from the Itty Bitty Backgrounds set in three different ink colors to form a fantastic confetti-like pattern.

So Mavis, you rock! I'm wild abotu this card and am definitely going to have to CASE it as soon as I get the Wild About You set!

Friday, April 27, 2007

who's that girl?


Just a quick post tonight because tomorrow is my demonstration at the Stampers in Stitches meeting and, as usual, I'm still getting ready. All the card stock is cut for the 100 make-and-takes of the mini accordion scrapbook, but I still have a lot of scoring to do, plus finishing my flip book so I can have something to display and get into that drawing (and maybe win some new stamps!). But, of course, I couldn't let an evening go without a post, so I stamped a quick card.
Today's limited supplies challenge on splitcoast was to make a card for a guy with a set that is not traditionally masculine. Well, do you recognize this young lady? Yup, it's our preggo friend from the Swell News set, definitely not a "masculine" stamp. Now, it would have been easy to use this stamp as is for a pretty cool father's day card for a dad to be, but that would have been a cop out; So I decided to try a technique that I have not done before. In fact, I can't even remember what it's called. Basically, you stamp on a piece of designer paper and then trim the paper and add it to the same image stamped on plain card stock. So in this case, I stamped the girl onto Rebbecca designer paper, and then trimmed out her dress. Of course, as I was trimming I also trimmed away her cute little belly, so that she would be just a bit more shapely. I used the going gray marker to color just the arms and head on the stamp and then stamped on whisper white card stock. I added the designer paper dress and a cake from the Voila set. I used certainly celery and almost apricot for the mats, since these colors are in the designer paper. The base of the card is brocade blue. I'm not a guy, but I have to think that no man would be offended by a card with a blond bearing cake! Hope you agree!

Thursday, April 26, 2007

Classy Ladies and Orchid Opulence

I almost didn't have anything to post tonight, not because of lack of inspiration but because I was fortunate enough to spend another evening with my fellow SIS demos who attended my pastels class. We laughed and stamped and snacked and really enjoyed ourselves! But since you already saw all the pastels projects several times over, at the end of the evening I had nothing new to show you.

Fortunately, the challenge on splitcoast today was to use Orchid Opulence in a card, and this just happens to be one of the colors I came to like recently (after ignoring it for almost a whole year). So I had a reason to stamp a quick card. I grabbed the On Gossamer Wings set (one of my all-time favorites) and decided to use a layout from a previous sketch challenge. I knew I wanted to use Elegant eggplant as the base and I had to use orchid opulence, but the third color (Blush Blossom) took a little longer to find. These were also the three colors I used to stamp and color, with a little bit of sage shadow thrown in for the leaves. It's not bad for a card stamped on a real time budget.

Wednesday, April 25, 2007

Double Challenge


I didn't have a lot of time to stamp tonight as I spent most of the time getting ready for tomorrow's pastels class. My DH helped me by collating and bagging all the projects, which saved me so much time! So I was able to stamp one quick card, and since I already had the In Full Bloom set out to pre-stamp an element of one of tomorrow's cards, I decided to use it on this card as well.

I actually had the idea for this card all day, right after I found out that this was the sketch for today's sketch challenge. I wanted to combine the sketch with the color challenge from yesterday, which was to use pumpkin pie, bravo burgundy and always artichoke. I also wanted to do some paper piercing -- a technique that is very striking and effective yet one I hardly even use.

I used the blender pen to color in the flower and distressed the edge of the pumpkin pie mat. Definitely not my finest hour, creatively speaking, but it's the best I could do tonight.

Tuesday, April 24, 2007

One last medallion card

Yesterday Nancy commented that she was tired of snow and ready for spring, so I had to make one last medallion card just for her. I used the Spring Flowers (or is it Spring Showers -- I can never remember) double sided designer paper and the Doodle That set. I also used the linen background stamp and cocolate grosgrain ribbon. Simple but cute!

But of course I do love snowflakes, and I have a personal challenge to make 10 Christmas cards every month, so here is another card I made last night with the four seasons double sided designer paper. I punched the little snowflakes out of the paper with a 1/2" circle punch and then centered them on 3/4" circles punched out of night of navy. Just in case you couldn't tell from all the snowflakes, I added a little tab that says "winter". Cool!


Monday, April 23, 2007

Demo for the Stampers in Stitches meeting

This Saturday we're having a Stampers in Stitches meeting and I am so excited. All of the demos in our group who earned the cruise to the Panama Canal will be there to tell us about new things we can expect in the next catalog. There will be lost of pictures and project displays (yes, of course I'm bringing the punch brunch display in the hopes of winning some more free stamps in the display drawing!). Hopefully we'll get to see pictures of the new in-colors, which sound really cool! And we'll be stamping several projects, including a project with a new stamp set that will not be available until July and a mini accordion scrapbook that will be demoed by yours truly.


I can't take the credit for the design of this cute little mini scrapbook -- that honor belongs to a very talented demonstrator Janine Tinklenberg (a/k/a Jantink on Splitcoast). I modified her direction somewhat so that the book could be done using 8.5x11 card stock, instead of a 12x12.


So are you curious yet? Wanna see a preview of the project. OK, OK. Here is the outside (measuring 3x3"):


And a couple of views of the inside (the pages are 2.75" x 2.75"):


If you've ever been curious about what it's like to be a demonstrator and be a part of a really cool group of stampers, please join me at the meeting as my guest for free. I guarantee you'll have a good time and get not only lots of "inside" information but also get to make some super cool projects. For more details please see my website.

Glenda, our group leader, has extended the RSVP deadline but if you'd like to come with me you really must let me know ASAP! So call or e-mail me at stampwithdiane@comcast.net. Come on, what are you waiting for? I could use the moral support!

More square steps medallion cards

When I posted my tutorial a couple of days ago, I only had time to take photos of the technique and I didn't actually have time to create a card with the medallion I created. Well, today I decide to remedy that, and since I used the winter themed sheet of the four seasons designer paper, I figured I could make a card with the medallion and make a holiday card to fulfill my New Year's resolution!


So here is the card I created with the medallion from the tutorial. Instead of the spring bouquet punch, I used the snowflake punch along with the 1 1/4" circle punch to create the center of the medallion. I then added a snowflake that I punched out of the same designer paper with the 1/2" circle punch for the center of the navy snowflake and added a bashful blue brad in the very center just for good measure. To add more interest to the card I used the double rectangle punch to create holes through which I threaded white grosgrain ribbon. I stamped the bashful blue base with the linen background stamp inked up with bashful blue ink and I added the greeting from the Snowflakes set (one of my favorites!). I'm quite pleased with the end result -- what do you think?


Of course, the reverse side of the medallion is really just as cool. So for my next card I decided to use this reverse side. Continuing with the snowflake motif, I once again used the snowflake punch with the two circle punches to create the centers for my three medallions. I thought these were decorative enough in themselves, so I added a simple sentiment made with the Everyday Flexible Phrases set (get it for 20% off this month only) and left it at that. Again, I'm pretty pleased with the results (What, twice in one day? Call the psychologist -- this may be a breakthrough --LOL!) but I'd love to know what you all think.

Sunday, April 22, 2007

D'oh!


You know what they say about the best laid plans. I swear, every time I try to plan something in advance there is always some kind of a glitch or problem, and I end up having to make changes. I guess May is not going to be any different. So this is to let you know that I'm making a couple of changes to the May schedule of events.
The Cinco De Mayo Punch Brunch is still going forward, but I've had a lot of people mention that they really liked the pink card and wanted the option of making that card. then someone reminded me that this year May 5 is National Scrapbooking day, and here I'm doing a program with just cards. So the bad news is the program is getting just a little more complicated. The good news is that anyone attending will now get to choose the 4 projects they want to make. But I will need to know the selections at the time of registration and these selections will be final on May 1.
The projects you can choose from are the four cards shown at the bottom of the April 20 post, this card from the April 19 post, and the 6x6 scrap page shown above. As befitting a punch brunch, all 6 projects feature different Stampin' up! punches. The price is still $10 or free with $45 purchase of Stampin' Up! products, but now you can also attend for $5.00 with a $25 purchase of Stampin' Up! products.
I really hope you like the scrap page I designed with the punches. I wanted a flower theme, since May is known for flowers, and it was fun creating the different flowers from punched shapes.

Saturday, April 21, 2007

How to make a square steps corner punch medallion

For two days in a row now I uploaded cards using the square steps medallion, and yesterday Steph asked for a tutorial. Well, tutorials are not really my thing, but this is such a small project I thought I would give it a shot. So here goes.

Step 1: Start with a 2x2 square of designer paper or card stock. Here I'm using one of the patterns from the Four Seasons Double Sided Designer Paper pack.

Step 2 --hold your punch upside down and slip in the square all the way until the corner is up to the corner guide. Punch. Repeat on all four corners.
This is what the paper looks like when all four corners have been punched.
Step 3. Push each of the punched corners to the back of the card stock so that the flip side of the paper shows in the front. This technique creates the most dramatic effect when the pattern is very different on both sides of your square (like here).
This is what the medallion looks like with all of the corners pushed back. Now attach something to the center (on my cards I attached flowers punched with the spring bouquet card). That's it. You're done.
Hope this mini tutorial was helpful. This is just one of the really cool things that can be done with the square steps corner punch. It's really a very versatile punch and cool for both card making and scrapping!

Friday, April 20, 2007

Just a slight modification

Edited to add: New pictures of the projects, taken during the daytime. They're a little bit brighter so everything is easier to see.

To my surprise, people actually really liked the plain and pink card I made yesterday. What really amazed me is the the reaction was uniformly positive among men I showed the card to (My DH and co-workers) -- something I never would have expected given the pinkness of the card. But nevertheless, I felt the need to come up with something different for the punch brunch, and here it is. Similar to yesterday's card and using some of the same punches and techniques, and yet somehow a little more, I don't know, grown up and sophisticated.

The center medallion on the card is similar to yesterday's medallion, but instead of card stock I used a piece of the Au chocolate designer paper. Of course, the designer paper is chocolate and vanilla in color and no, your eyes are not deceiving you, there's not a hint of vanilla on this card. So what happened? I simply decided to add color to the designer paper with my brayer. And to add even more interest, I brayered each side with a different color, so that when the punched paper was flipped, the difference would be more pronounced.


In addition to the square steps corner punch and the spring bouquet punch, this card also makes use of the new spiral punch and the designer label punch. So it truly is a perfect punch brunch project!

And , just as a reminder, here are all four of the cards we'll be making at the Cinco de Mayo Punch Brunch. See my web page for more details and if you want to join me make sure to RSVP by May 1.


Thursday, April 19, 2007

A woman's prerogative


As I mentioned yesterday, I spent most of this evening at the Itasca Community Library book sale. Unfortunately, we didn't get the turnout we normally get on a preview night, which means we're going to have to sell that many more books over the next three days to meet our last year's totals. The good news is that the low turnout means there are a ton of great book left, so if you're looking for some summer reading on a budget, stop on by!
I know I was going to post the final punch brunch project tonight, but when I came home and looked at it again I didn't like it. It just didn't seem fiesta-worthy, especially when I placed it next to the other cards to take a group photo. So I went back to the drawing board and my punches to come up with something a little more inspirational and unique. And I came up with this card. It's kind of unique, at least in the way I used the square steps corner punch, but it's also kind of plain and so very pink! I like it, but like the other card, I don't think I like it enough. Hopefully when I head into the stamp room tomorrow I will come up with something truly spectacular, or at the very least something I can be happy to share with my cinco the mayo brunch guests. Have a great night!

We have pictures!

Woo Hoo! Whatever glitch we were experiencing yesterday is fixed and I can once more upload photos. So here are two more projects we'll be making at the Cinco de Mayo punch brunch. The first is a flower and butterfly card made exclusively with punches -- not a single stamp in sight! I did sponge the bashful blue card stock with bashful blue ink just to give it a little texture, but otherwise all of the shapes (except for the little certainly celery strip that serves as the stem) are punched either from the Au Chocolate designer paper or chocolate chip card stock. You can stamp whatever sentiment you want inside or just leave it blank and use for just about any occasion. Such a cute card and so fast and easy to put together!
The second card is obviously a birthday card and it is a little more intricate, but it uses such cool techniques and is bound to impress the recipient! The top of the cupcake is made with the round tab punch and the bottom is a piece of Au Chocolate designer paper that I ran through the crimper. The frosting and sprinkles, made with crystal effects and beads, add a lot of texture and make the cupcake look super yummy! The candle is made with the word window punch an the flame with the horizontal slot punch, and a couple more punches are used on the chocolate chip mat. Unlike the last card, this one does feature a couple of stamps -- a background stamp from itty bitty backgrounds and the sentiment stamp from All Year Cheer II (which you can purchase this month at a 20% discount).
There is one more project I have to show you, but no time to upload and describe this morning. I may also not have time tonight, as I will spend my evening at the Itasca Community Library helping out at the preview for our annual used book sale. If you're interested in taking a first look at the books that are available, tonight's event is from 5-8:30 p.m. and is free for members of the Friends of the Itasca Community Library and $5.00 for the general public. The sale officially opens to the public tomorrow and runs through Sunday. The hours aer 9-5 Friday and Saturday and 1-5 on Sunday. Hardcover books are $.50, paperbacks are $.25 and AV materials are $1.00. On Sunday we'll also be selling a paper grocery bag full of books for $5.00. The Itasca community library is located at 500 West Irving Park Road in Itasca, IL. Hope to see some of you there!

Monday, April 16, 2007

A little preview of a special May event


In the next couple of days I will be posting my May schedule of events, including a super special event that will take place early during the month at which we will make four projects, including this card. I copied the pinwheel idea from a stamper whose splitcoast name is Homew2. It's a fantastic idea as it really gives the card a lot of dimension and does a great job of featuring the double sided nature of this designer paper. To make the card even more special, I embossed the greeting and the brads with very vanilla embossing powder and tied on vanilla wide organdy ribbon. I also used dimensionals to attach the close to cocoa layer to the card base.

To me, this card is just sumptuous and rich and delicious looking. And it is only the beginning! I can't wait to show you the other projects we'll be making and to tell you more about this exciting event! But right now it's getting late and it's a work night, so I must be off to bed. Happy Monday!

Sharing and learning

It's funny, but when I first signed up to be a Stampin' Up! demonstrator I thought it would just be for the discount for myself -- I really didn't think I was good enough to be a demonstrator for others. But then I did my first workshop demo and liked it and I found that the more workshops I did the more comfortable I felt and the more I enjoyed them. I just love sharing this craft with others, and workshops are he best way to introduce new people to stamping.


Of course, the sharing doesn't just go one-way, and yesterday's workshop was the perfect example. The hostess was my friend Carol, and the guests were her mom and MIL, her daughters, sisters and niece. There were eight guests in all and none of them had ever stamped or been invited to a Stampin' Up! workshop before. Considering the number of demonstrators in the Chicago land area this is difficult to believe, but then again it wasn't so long ago when I was in the same position. In any case, these first time stampers not only enjoyed themselves, a couple of them actually created their own card designs which turned out so cute I just had to CASE them and post them here.

You might recall from my weekend post that I was going to give the guests a choice of two cards, which I did. both cards used the Silly Sealife and Loads of Love accessories sets. I store the loads of love accessories and loads of love set together, so I brought both of these with me to the workshop along with silly sealife. Once the ladies saw the stamps, some of them decided to get creative and modify my design. So grandma M decided to use the octopus instead of the whale, and gave him two bundles of birthday presents to deliver. I stamped the card shown here, but it's totally a copy of her design. Super cute, right?

Carol's daughter Mallory decided to avoid sealife altogether and instead she stamped a pure loads of love card for her honey. They will be celebrating their first anniversary soon, and she thought this would be a cute card for him. She did a great job watercoloring and used the brocade blue Watercolor wonder crayon on the windows of the truck to make it look like real glass. Now remember, both she and her grandma were first time stampers, and already they're designing cards like pros, with limited supplies to boot! How awesome is that?
And so what I love most about demonstrating at workshops is that I sometimes learn as much as the guests. Ladies, if you're reading this I love both of your designs and will use them in the future!

Sunday, April 15, 2007

After Remembering You - Part Deux

Yesterday I posted the Silly Sealife cards I made using the basic black ink, watercolor wonder crayons and aquapainter from the Remembering You Simply Sent kit. I really liked those cards, but I wondered what else I could come up with using the supplies in the kit, and maybe a little bit more. Here were the parameters I set for myself -- what could I do with the above mentioned items from the kit plus the Remembering You stamp set, some confetti white card stock, a pack of Rich regals card stock and a rose red marker. And here are the results (so far). On the first card I stamped the outline of the flowers in basic black ink. I then used the always artichoke watercolor wonder crayon to stamp the leaves. Next, I inked up the solid flower stamp using the rose red marker. I tapped the stamp with the aquapainter to add a little water and stamped. I then created a little pool of ink with the marker on top of the lid to my stamp set, picked up this ink with the aquapainter and filled in any white spots on the flower petals. Finally, I lightly colored the confetti white card stock between the flowers with the brocade blue watercolor wonder crayon and blended with the aquapainter for a very subtle background color effect.

I matted the confetti white card stock on Always Artichoke, using the square steps corner punch in just one corner for a little bit of interest. I adhered the image to a Rose Red card front and stamped the sentiment at the bottom of the card.

For my second card I inked the outline flower stamp with the rose red marker and stamped it onto the confetti white card stock. I colored the flower center with the brocade blue watercolor wonder crayon and blended the color with the aquapainter. I created another pool of rose red ink with the marker and used the aquapainter to pickup this ink and fill in the flower petals. I then used the always artichoke watercolor wonder crayon to lightly color in the background and blended with the aquapainter. I matted the image with always artichoke and set it aside.

Using the brocade blue watercolor wonder crayon I colored the solid flower stamp. I tapped the stamp with the aquapainter and stamped the flower onto a strip of bordering blue card stock. (I used bordering blue card stock instead of brocade blue on the theory that if my supplies truly had been limited I would have used the brocade blue card stock to re-create more cards from the designs in the kit. I figured that the colors were similar enough for this not to matter and I think I was right.) I repeated this several times.

When I was finished with the solid stamp, I used the rose red marker to ink up the outline stamp and stamped the outlines over all the solid flowers. I then adhered this strip to a regal rose card base, and adhered the always artichoke card stock on top. I used the rose red marker to ink up only the "your special day" portion f the sentiment, and stamped it at the bottom of the card.

I really enjoyed my very own little "limited supplies challenge" and I'm pleased with the cards I created. Hope you like them too!

Cool Workout for your brain!

For those of you who never scroll down past the first article, I would encourage you to do so today to check out the Workout for Your Brain section in the right hand column. There is some truly interesting stuff there today. For example, did you know Titanic sank today? Or that today is Leonardo DaVinci's birthday (figures he was an Aries!)? Or that Two Bald Eagles just hatched on Catalina Island for the first time in 50 years? Very cool! The Match-Up game is kind of fun today too! Enjoy!

Saturday, April 14, 2007

((((((((cyberhugs)))))))) to all of you!

I honestly don't even know how I could say thank you to everyone who has subscribed to the blog in the last week. I am just overwhelmed. And, as a result, to only has the blog stayed in the top 200 -- it actually reached top 185 today! Holy Cow!

By now, everyone who has subscribed using a disclosed e-mail address should have received a welcome message with a request for you to provide the name of the person who referred you to the blog, so that that person can be entered into the second drawing. When you reply to identify the person who referred you, please use the e-mail address that they used to subscribe or their blog address.

If you did not receive an e-mail (please check first -- I just sent the latest one) it's either a glitch in my e-mail program or you subscribed as an anonymous subscriber and I have no way to get in touch with you via e-mail. If this is the case and you want me to be able to reach you, please send me an e-mail to stampwithdiane@comcast.net ans let me know. I will do my best to correct the problem. If the anonymous subscribers do not want to be known that's fine, but it will make it impossible for me to identify you as a contest winner, as there are several anonymous subscribers. Sorry!

The contest will go on until the end of the month, so there's plenty of time for you to tell your friends so that they can enter and tell me that you referred them so you can get more entries too! Here is the link to the original post where I announced the contest, just in case my ramblings here are not clear: http://stampwithdiane.blogspot.com/2007/04/top-200.html

Thanks again everyone for subscribing!

After Remembering You

People often say that all good things must come to an end, and for the most part this is true. But often the end is not really the end, it's just a springboard to a new beginning. That's exactly the case with Stampin' Up!'s Simply Sent kits.

What am I talking about and why? Get ready -- you're about to get a tour of the muddled brain of this stamper! This morning I was sitting in my stamp room, having only had about 5 hours of sleep after last night's Bedlam, trying to figure out what cards I wanted to prepare for a workshop I'm doing tomorrow. I knew one of the cards would be the In Full Bloom card I made for the SCS swap, but I had no idea what to do for the second card. Suddenly my eye fell on the Remembering You Simply Sent kit. You know, the kit that comes with absolutely everything you need to create 10 cards (5 each of 2 different designs). I really love how easy this kit is to use for beginner stampers, and I thought it would be a good idea to introduce the stampers I was going to meet at the workshop to this awesome product. But the stamps in the kit are flowers, and I was already doing a flowery card. Hmm. What to do?

Suddenly, Eureka! I figured it out! I would design a card that would use the products that would be left over from the kit after the consumables from the kit are gone, to show people that just because a good thing came to an end, doesn't mean that the fun is over -- there are still cool products left that are just waiting for another creative avenue of expression.

On my first card I used the whale and turtle from my new Silly Sealife stamp set. I based my design on a card I saw by another stamper, Kelly Sampson. She used these two stamps and the greeting from Loads of Love on a shadowbox, and I was struck by how well the greeting and the stamps went together. So I stamped the turtle and whale on confetti white card stock in basic black ink that comes in the kit, colored them in lightly with the brocade blue, perfect plum and always artichoke watercolor wonder crayons that are also part of the kit, and blended the colors with the aquapainter that, yes, you guessed it, is also part of the kit. I matted the image on a piece of always artichoke card stock and tied black gingham ribbon around the bottom of the always artichoke piece as an accent. I attached the always artichoke piece to the brocade blue card base and stamped the greeting on the base in basic black ink. And I thought I had a pretty cute card that would show new stampers a great water coloring technique while demonstrating that even after they make their 10 cards from the Simply Sent kit, they will have products they can use over and over again on new designs.

I could have stopped there, but I wondered if maybe some people wouldn't prefer something more useful, like a birthday card. And, of course, my mind kept going back to the cute card designed by Meg Shumaker where the whale is bringing Christmas presents. So I decided to make a birthday card using Meg's idea and the same materials as the other card. As you can see, on this card I flipped all the card stock, so that the card would be vertical. This time the whale is the bearer of birthday gifts. Again, the images are stamped in basic black ink on confetti white card stock and colored in with watercolor wonder crayons and aquapainter. The greeting is from the Eat Cake set, and I got a kick out of the fact that it's in the same font as the greeting on the other card.

Since both cards use the exact same materials, tomorrow the workshop guests will have a choice of which card to make. I really like this idea and may try to incorporate it into future workshops.

So here are both cards, side by side. I'm rather partial to them. What do you think?

Friday, April 13, 2007

Matchbook mini scrapbook album

So I'm back with the final Office Accoutrement project, and this one is so cute! I can say that because I was not the one who came up with the idea. I actually CASED it from another demonstrator -- Jenn Balcer. She used different colors and paper and stamps, but the matchbook album thing? It's all hers (except that she may have CASEd it from someone else -- I honestly do not remember)!

In any case, when closed this mini scrap album is regular card sized, so it will fit into a regular envelope to send to a loved one. It will be a bit bulky, so it may have to be hand-canceled and require extra postage, but it will fit into a regular envelope. As you can see, I made Birthday Wishes the theme of my album, but you could just as easily make this album for any other special occasion. In fact, done in different colors it would make for a really cute invite!

The cover of the album tucks into the bottom fold just like a matchbook cover. On the inside are several pages, each of which is tabbed, where you can add photographs or journaling. For my album I stapled them to the inside of the cover so that they can be flipped towards the front without falling out. Another way to go would be to leave them loose for easier removal. I used whisper white card stock that I turned into designer paper by using different small stamps from the Office Accoutrement stamps. I added a matching color tab and voila, the album is done. So cute, right?

Well, it's getting close to 7 which means the open stamp night attendees are about to arrive. I'm off to greet them and to order pizza! Yum! Hopefully I'll remember to take some pictures to post tomorrow. Hope you have an awesome Friday night!


Thursday, April 12, 2007

And now for something completely different

Maybe the title of my post is a little deceptive, since these are cards, so not completely different. But lately I've been posting a lot of projects made with the Office Accoutrement set and as much as I like that set, I thought you might be ready for a break. Tonight, as I was cleaning up my stamp room before tomorrow night's Bedlam, I found myself with a few minutes to stamp. I first stamped this card for this week's splitcoast color challenge. The challenge was to use sage shadow, basic black and real red card stock on a card. I confess this is not my favorite color combination. In fact, I typically avoid sage shadow. But I guess that's why they call it a challenge, right?

I'm actually reasonably happy with this card. I used only basic black ink, the three above mentioned colors of card stock and red grosgrain ribbon. I also limited myself to the use of one stamp set -- the Doodle That set from the Spring Mini. To give the flower a little splash of color, I actually stamped it onto red card stock and trimmed out just the top part and glued it onto the flower I stamped on the sage shadow square. It was such an easy and subtle way to perk up this otherwise plain card.


Once I stamped the first card, I decided that I really liked the layout and wanted to try making another card using the same layout and stamp set, but different colors. This time I used brocade blue, more mustard, ruby red and confetti white, colors suggested by Stampin' Up! in the demonstrator planner. In fact, this layout is also a suggestion from the demonstrator planner, which is yet another awesome tool that Stampin' Up! makes available to its demonstrators. Since I was stamping on the confetti white card stock, rather than using black ink I decided to avoid it completely. I therefore used more mustard ink to stamp the background on the more mustard card stock, and used brocade blue, ruby red and more mustard stampin' write markers to color the main image. I also distressed the edges of the ruby red panel and popped up the confetti white square on a dimensional to give the card a bit more texture.

Isn't it amazing how two cards using the same layout and the same stamp set can look so different? This is precisely why the Idea Book and Catalog is such a great source of inspiration. There are so many samples in the IBC that can be used to create unique cards just by changing the color of the card stock and ink or the stamp set used. So this week's challenge to my readers is to find a card from the Idea Book and Catalog and copy it using a different stamp set and/or different colors, but keeping the same layout. Have fun!

And be sure to come back tomorrow to see the last of the Office Accoutrement class projects -- the matchbook mini scrap-book.